This document describes how you can use individual Apsona components directly within Salesforce. For example, you can do the following:
- Include a direct link to any Apsona report or multi-step report in your Salesforce sidebar or home page, such that clicking the link causes the report to open and run immediately.
- Create a top-level tab in your Salesforce menu bar which displays an Apsona tabular view of any native or custom object.
- Set up an Apsona tabular view to appear as a related list in any of Salesforce’s detail pages.
Direct links to Apsona reports #
You can set up direct links to any Apsona report or multi-step report from within Salesforce. To obtain the direct link for a report or multi-step report:
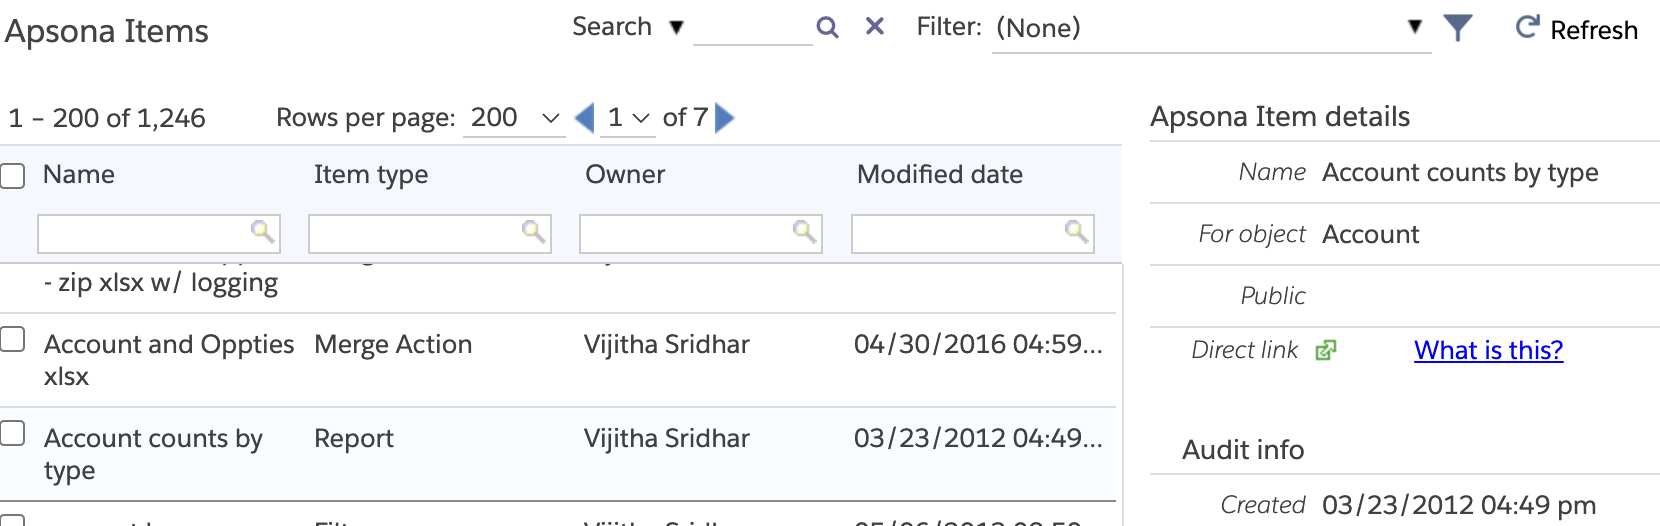
- In Apsona, navigate to Settings – Apsona Items.
- Find the report or multi-step report you want, using any of the filtering tools available, and click on the row. In the detail section, an icon is available showing the direct link to the report. This icon is not displayed for Apsona Items that are not reports or multi-step reports. Clicking this icon will open the report in a new window. Right-click on the icon and copy the URL.
- You can now use this link in several ways. For example, you include this link in a custom home page component. Alternatively, you can create a custom Visualforce page containing a list of “Quick links” to your most frequently-used reports.
URLs and parameters for Apsona reports #
The URL for an Apsona single-step report has the format
/apex/apsona__ApsonaForSalesforce?apsona_loc=part/report/ObjectName/ReportId
where ObjectName is the API name of the object for which the report was created, and ReportId is the record ID of the Apsona Item record containing the report. For example, if the report is for the Project__c object and has record ID a01C000000j2aOeIAI, then its URL would be
/apex/apsona__ApsonaForSalesforce?apsona_loc=part/report/Project__c/a01C000000j2aOeIAI
Filtering parameters #
You can also include URL parameters to filter the records shown in the report. The apsona_loc parameter can include a part that specifies the field on which to filter and the value to be used for filtering, separated by the ˜ (tilde) symbol. Here are a few examples:
- To include only Project__c records for which the
Status__cfield contains the valueIn Progress, use this URL:/apex/apsona__ApsonaForSalesforce?apsona_loc=part/report/Project__c/a01C000000j2aOeIAI/rawdata/Status__c~In Progress
- You can filter by fields in parent and grandparent objects. For example, suppose that the Project__c object has a lookup field
Manager__cthat refers to the Contact object, and the Contact object has a lookup fieldAccountIdthat refers to the Account object. Then/apex/apsona__ApsonaForSalesforce?apsona_loc=part/report/Project__c/a01C000000j2aOeIAI/rawdata/Manager__c--to--MailingState~CA
includes only
Project__crecords whose Manager’s Mailing State matches CA. - Continuing the above example, the URL
/apex/apsona__ApsonaForSalesforce?apsona_loc=part/report/Project__c/a01C000000j2aOeIAI/rawdata/Manager__c--to--AccountId--to--BillingCity~Madison
includes only
Project__crecords whose Manager’s Account’s Billing City matches Madison. In the above, the notationManager__c--to--AccountId--to--BillingCityshows a chain of fields separated by the--to--string, with all but the last field in the chain being lookup fields.
Showing Apsona reports in Salesforce dashboards #
The easiest way to show an Apsona report in a Salesforce dashboard is to create a simple Visualforce page for the report. You can then embed the Visualforce page anywhere in your Salesforce dashboard as a standard component. Here are the steps to create the page.
- Use the steps outlined above to find the report you want, and copy its URL.
- Create a new Visualforce page with the following content:
  <apex:page sidebar="false" showHeader="false">
	<iframe src="/apex/apsona__ApsonaForSalesforce?apsona_loc=LINK_TO_REPORT&showHeader=false" scrolling="auto" height="400" width="100%" frameborder="0"></iframe>
	</apex:page>
- Replace the LINK_TO_REPORT part with the report URL you copied above. You might need to adjust the height parameter (shown as 400 in the above example) to fit the height of the report being embedded.
Apsona tabular views as top-level pages #
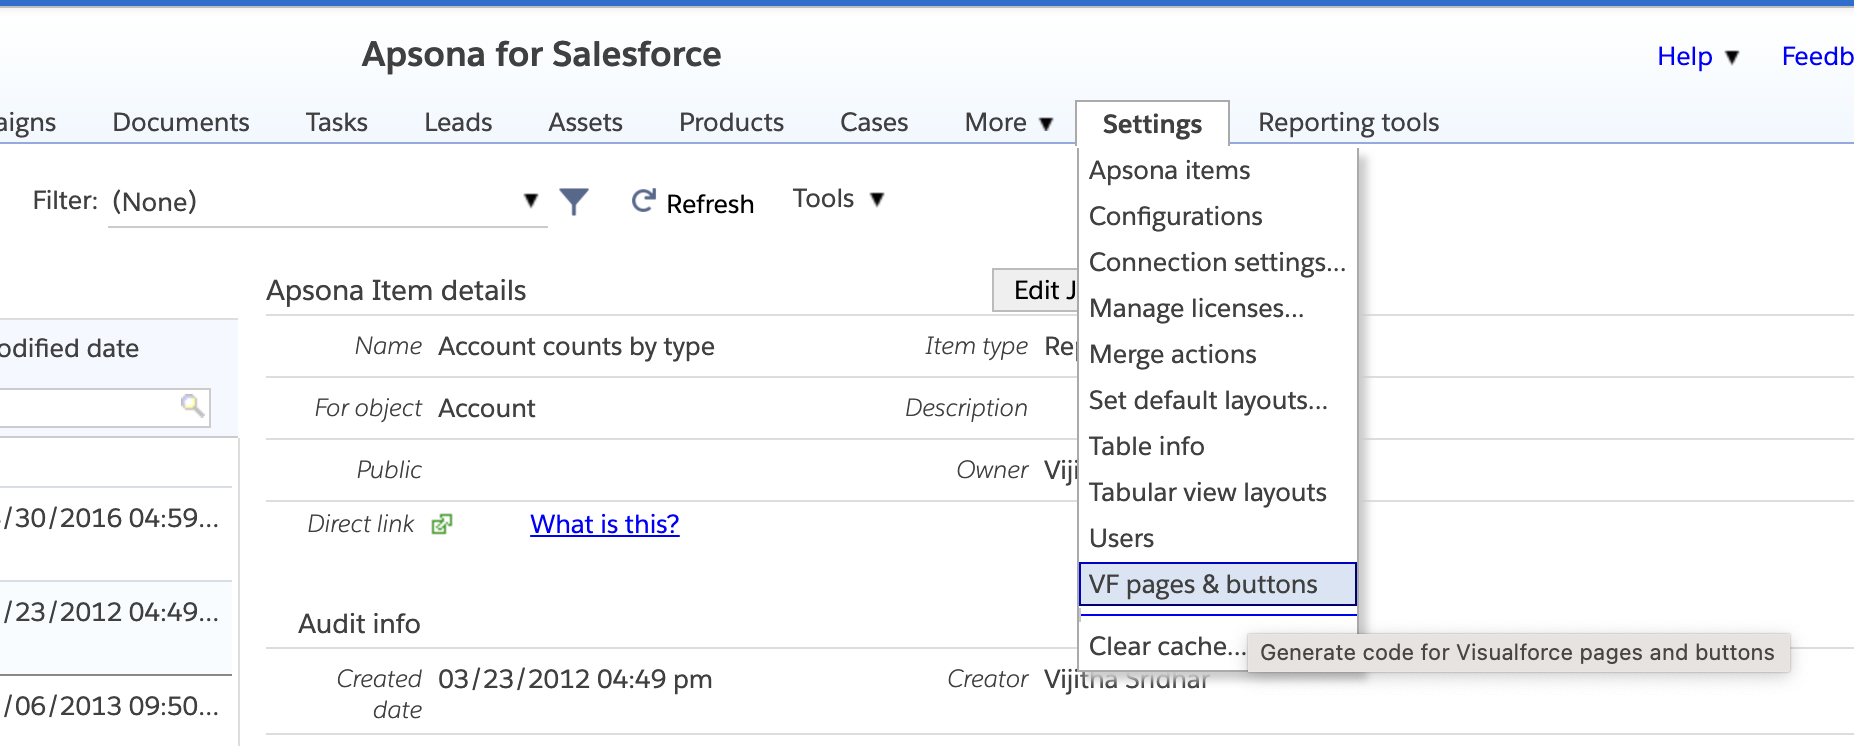
Here are the steps to create a top-level tab for an Apsona tabular view.Move your mouse over the Settings tab in Apsona for Salesforce. When the menu appears, click Visualforce Pages.
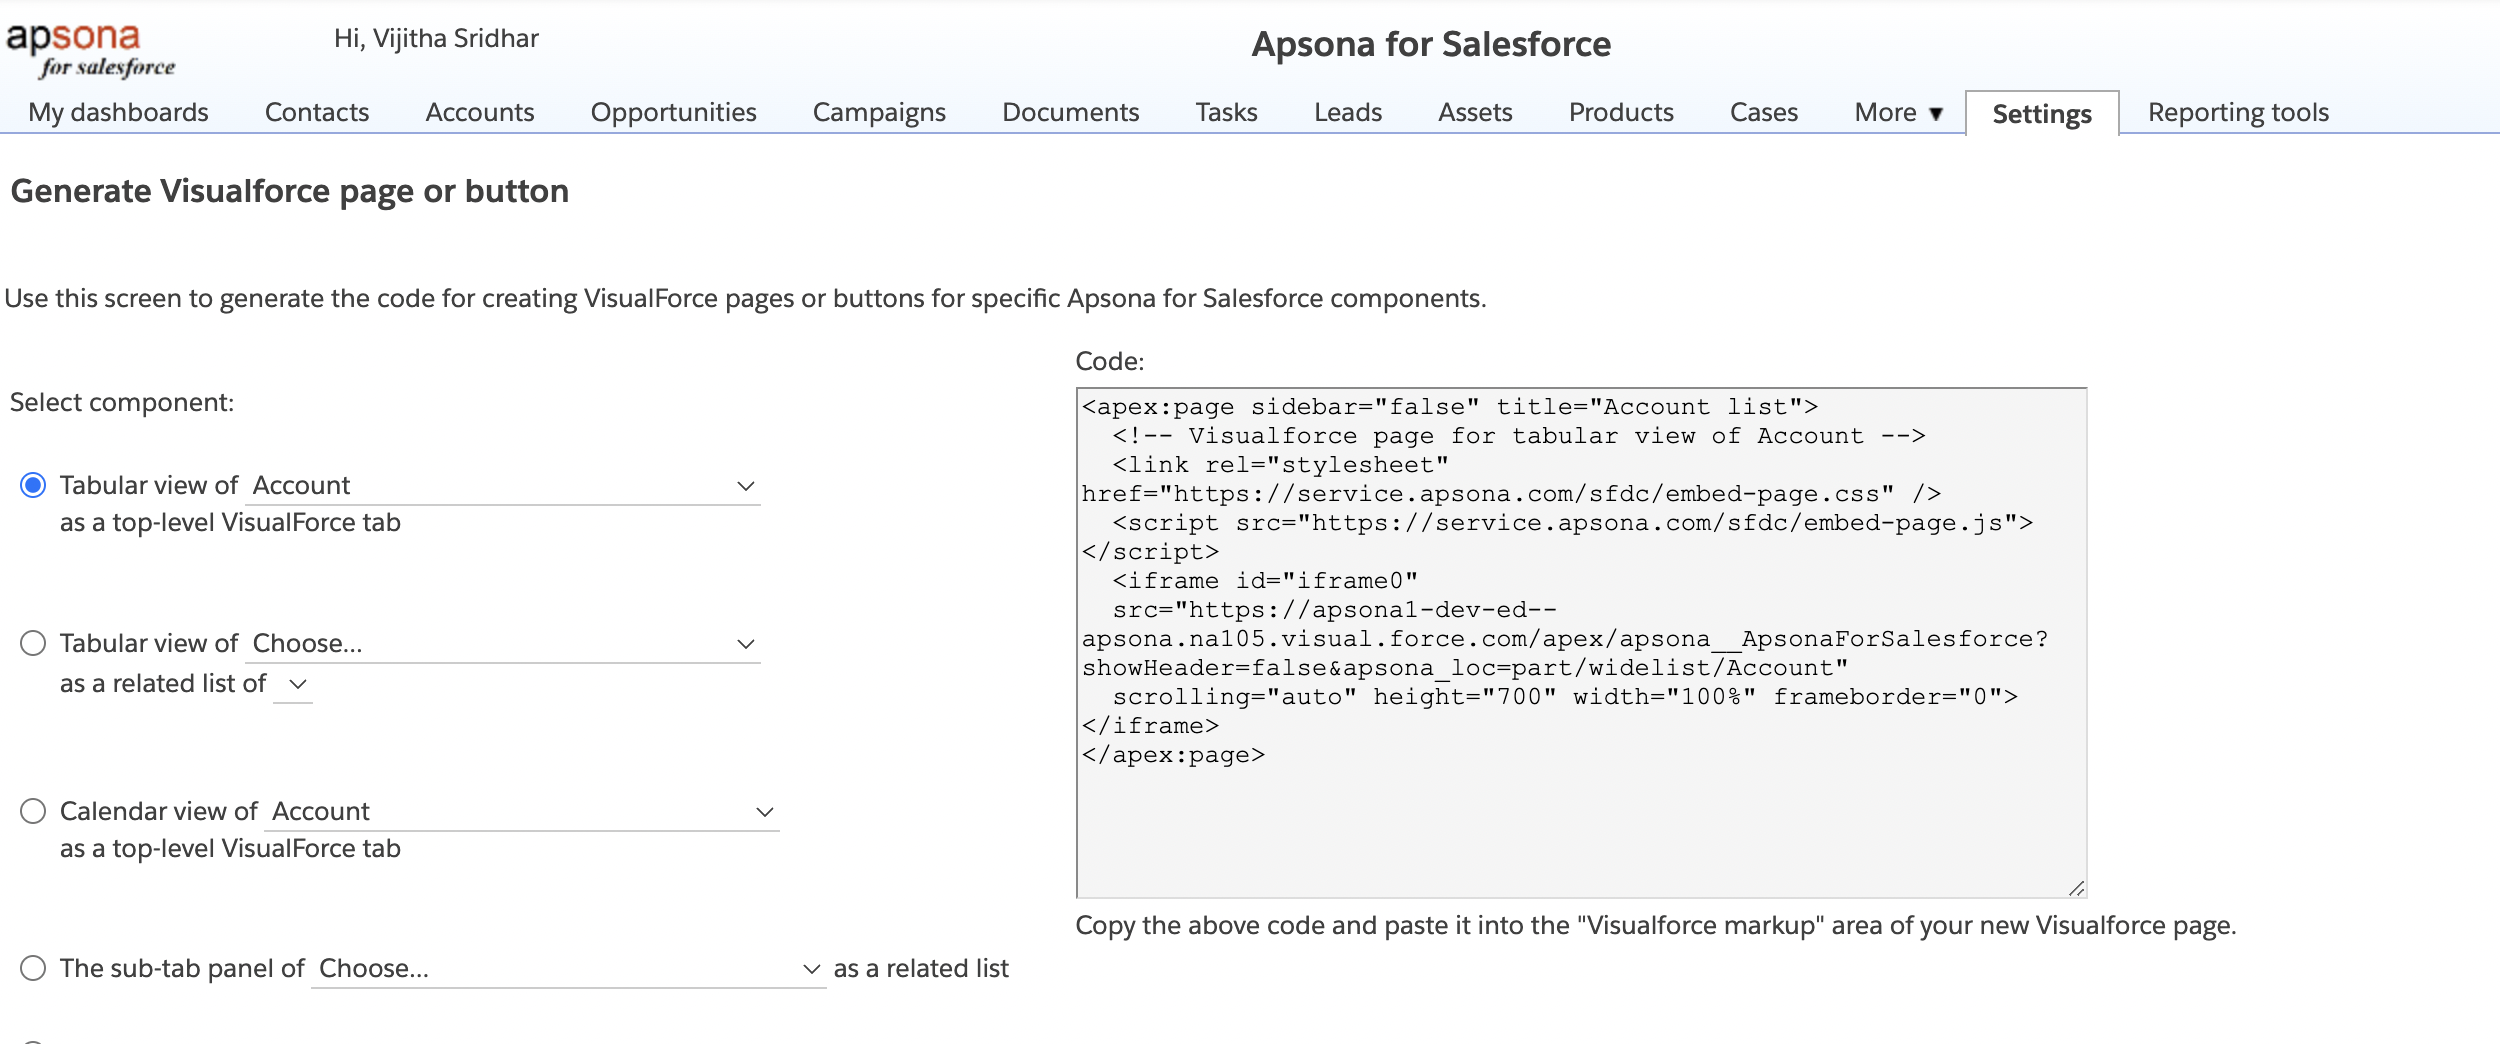
Use this screen to generate the code for creating VisualForce pages. Select the object from the dropdown for which you will be creating a top-level Visualforce tab and click “Generate Code” at the bottom of the page.
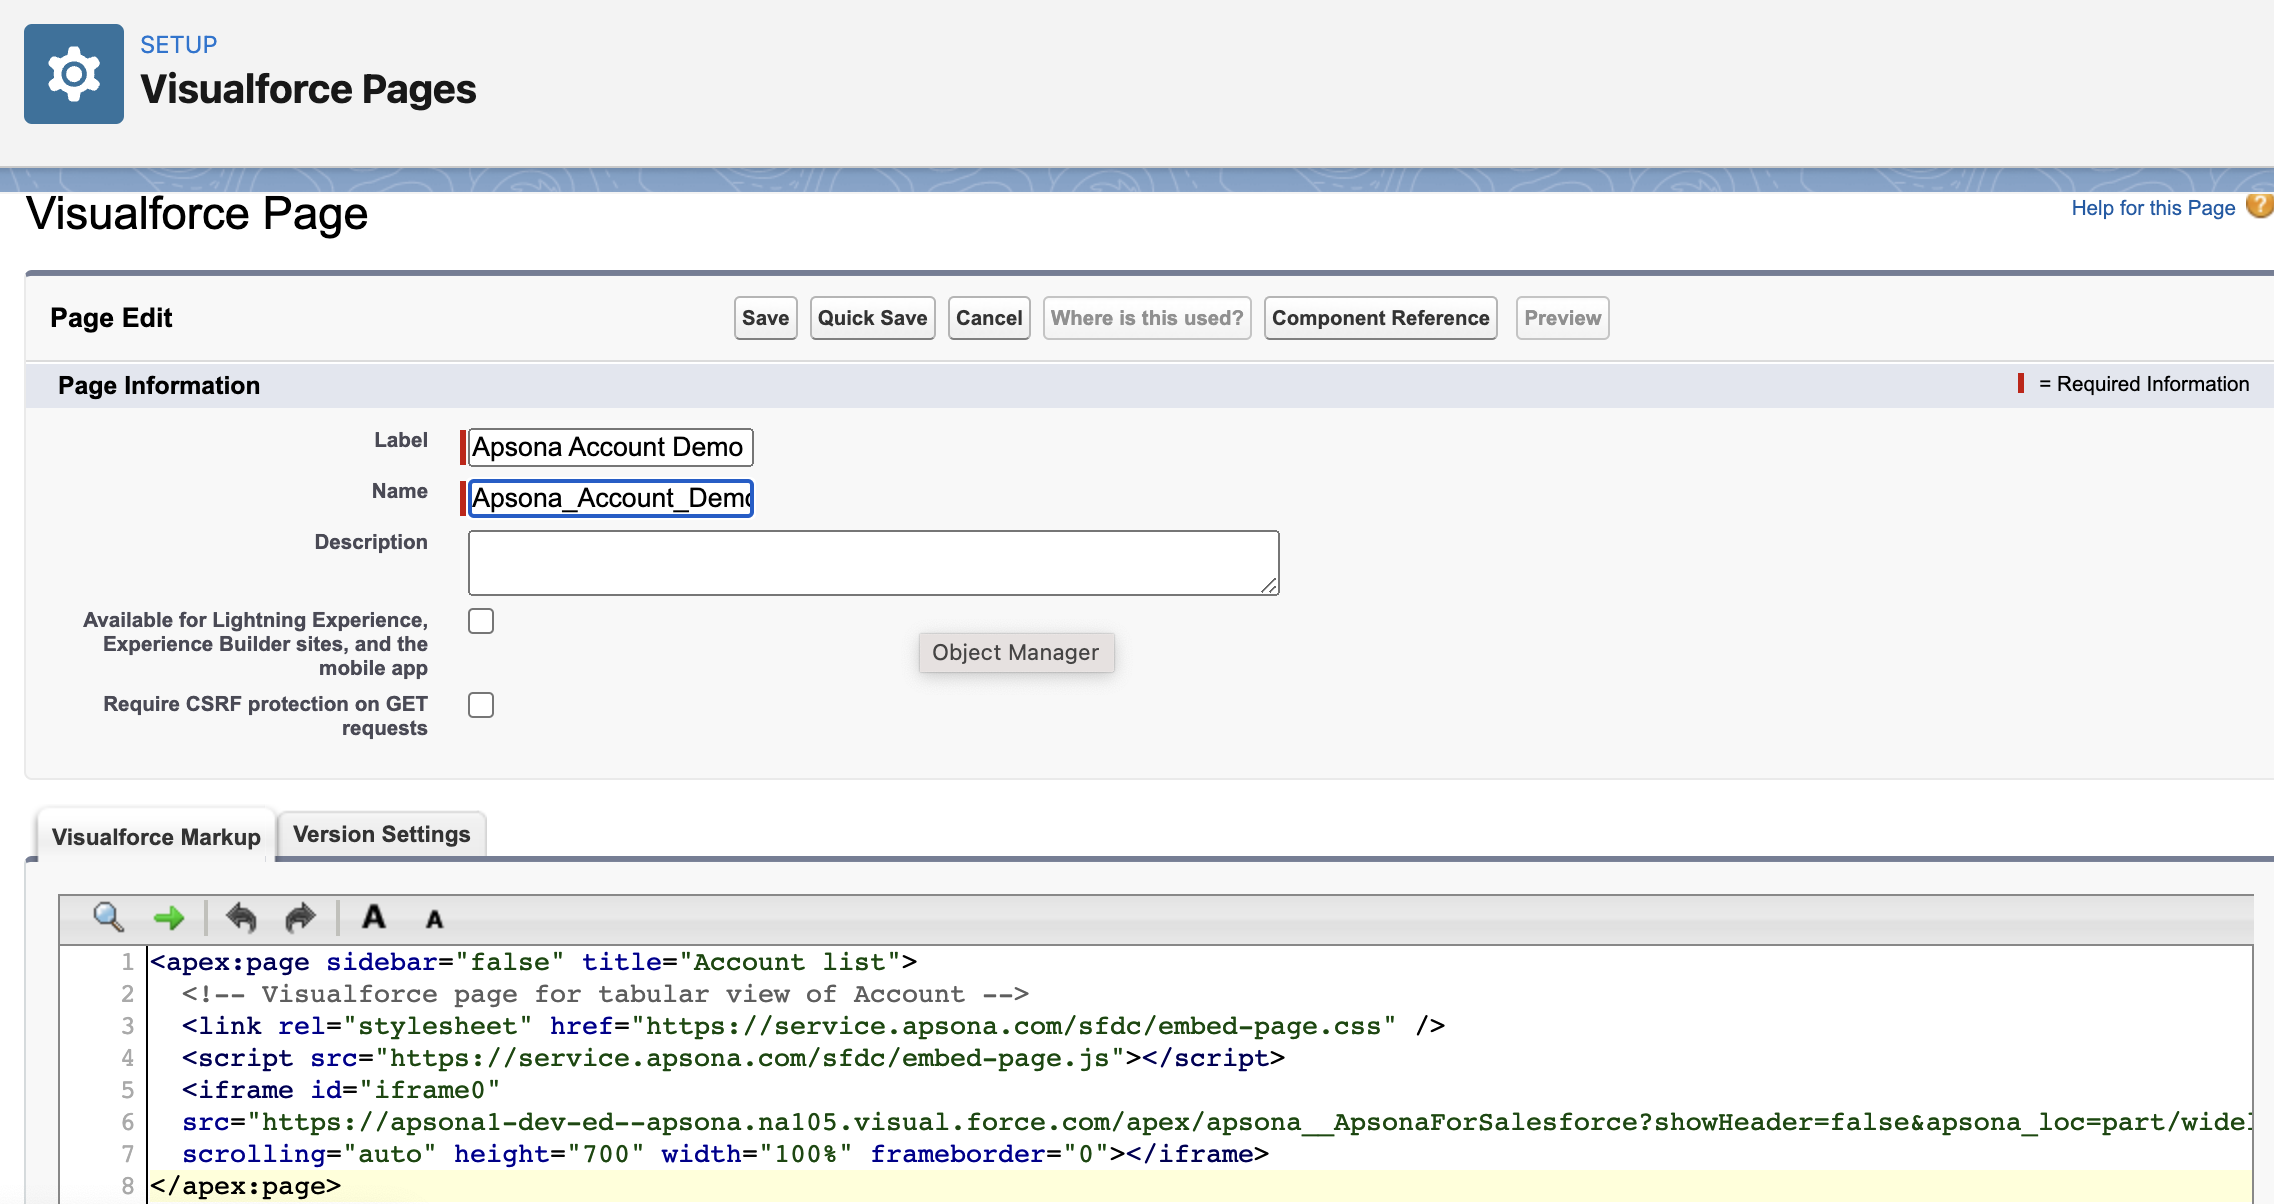
Copy the generated code. To create a new visualforce page In Salesforce, click Setup – Custom Code – Visualforce Pages.
Give the new Visualforce page a Label and a Name. Add underscores between words in the Name. Paste the code generated from Apsona in the Visualforce Markup area. Click Save. The new Visualforce page is now ready.
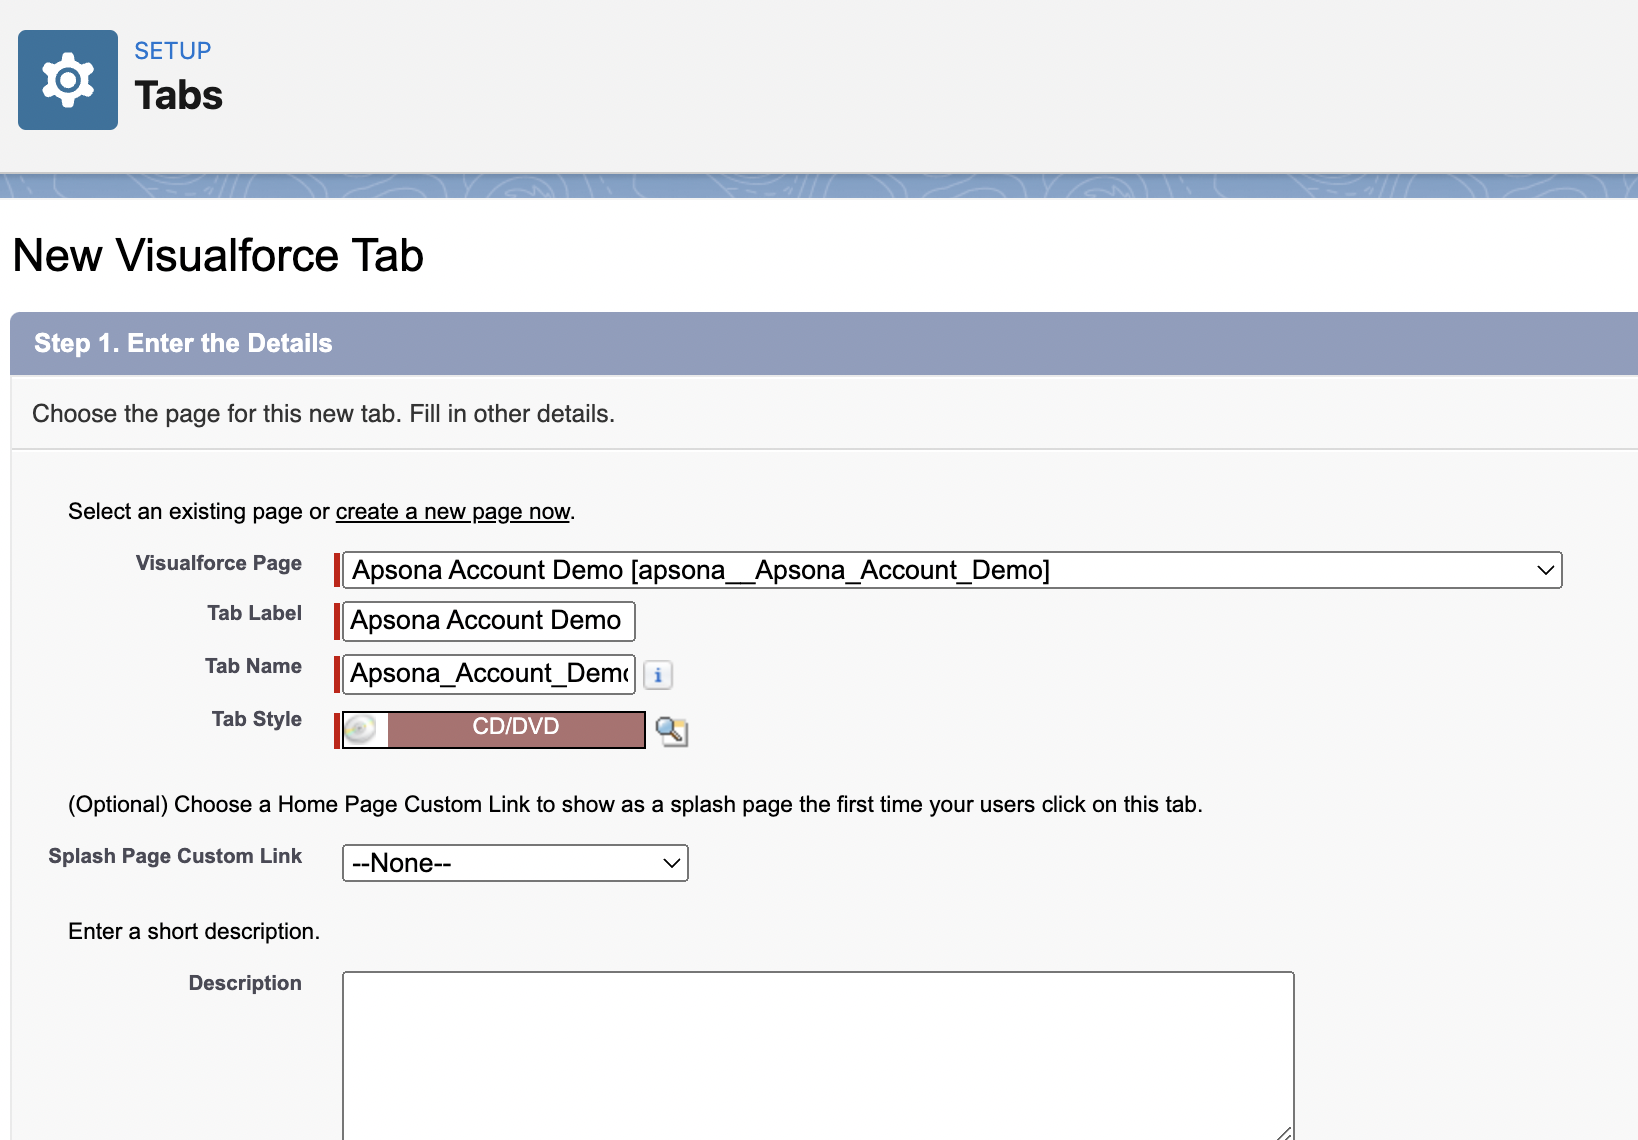
The new page now requires a tab. Click Setup – User Interface – Tabs. Click New under Visualforce Tabs.
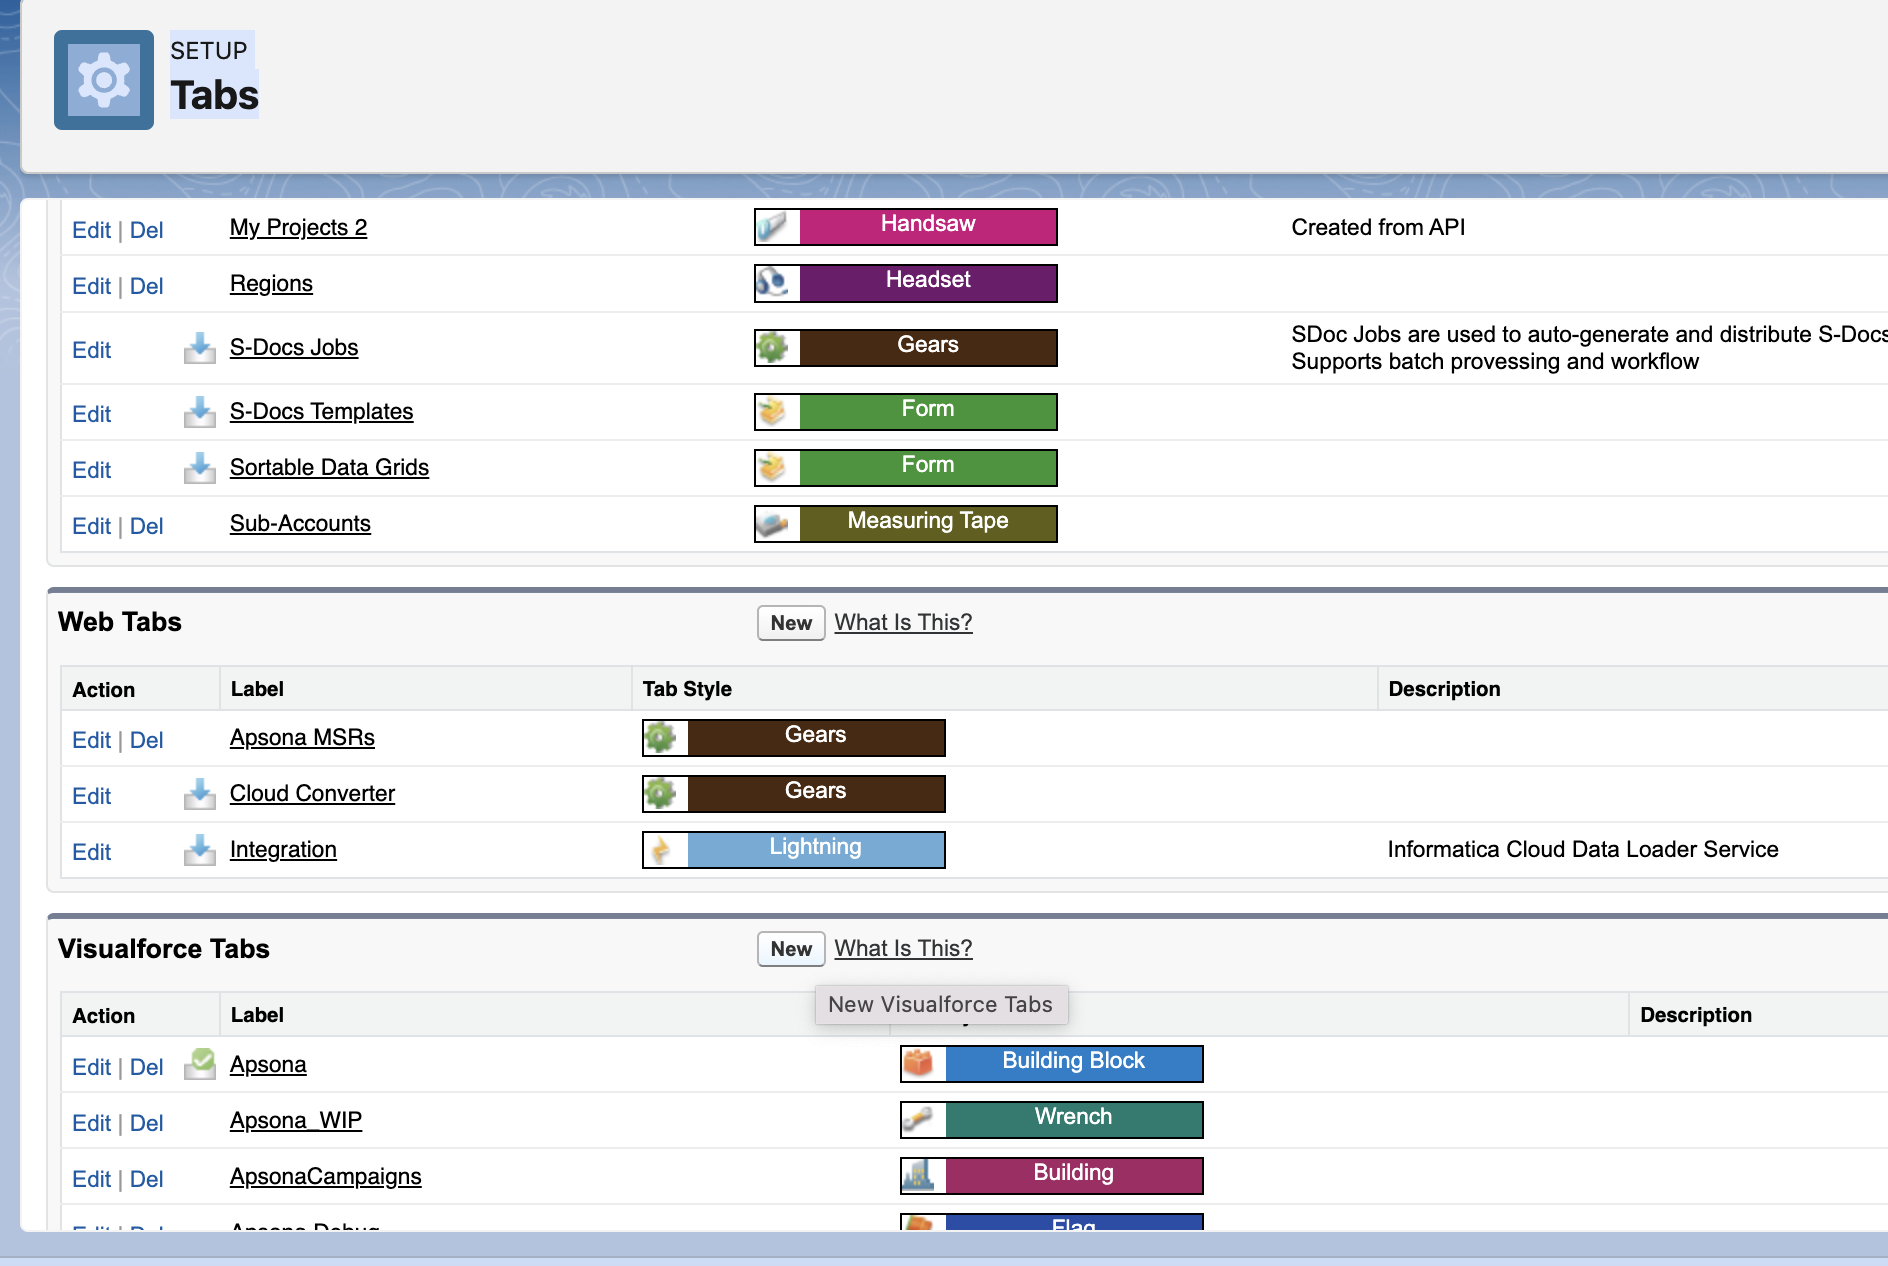
Select the newly created Visualforce page from the dropdown. Give the tab a label, a name and select a tab style. Save the tab.
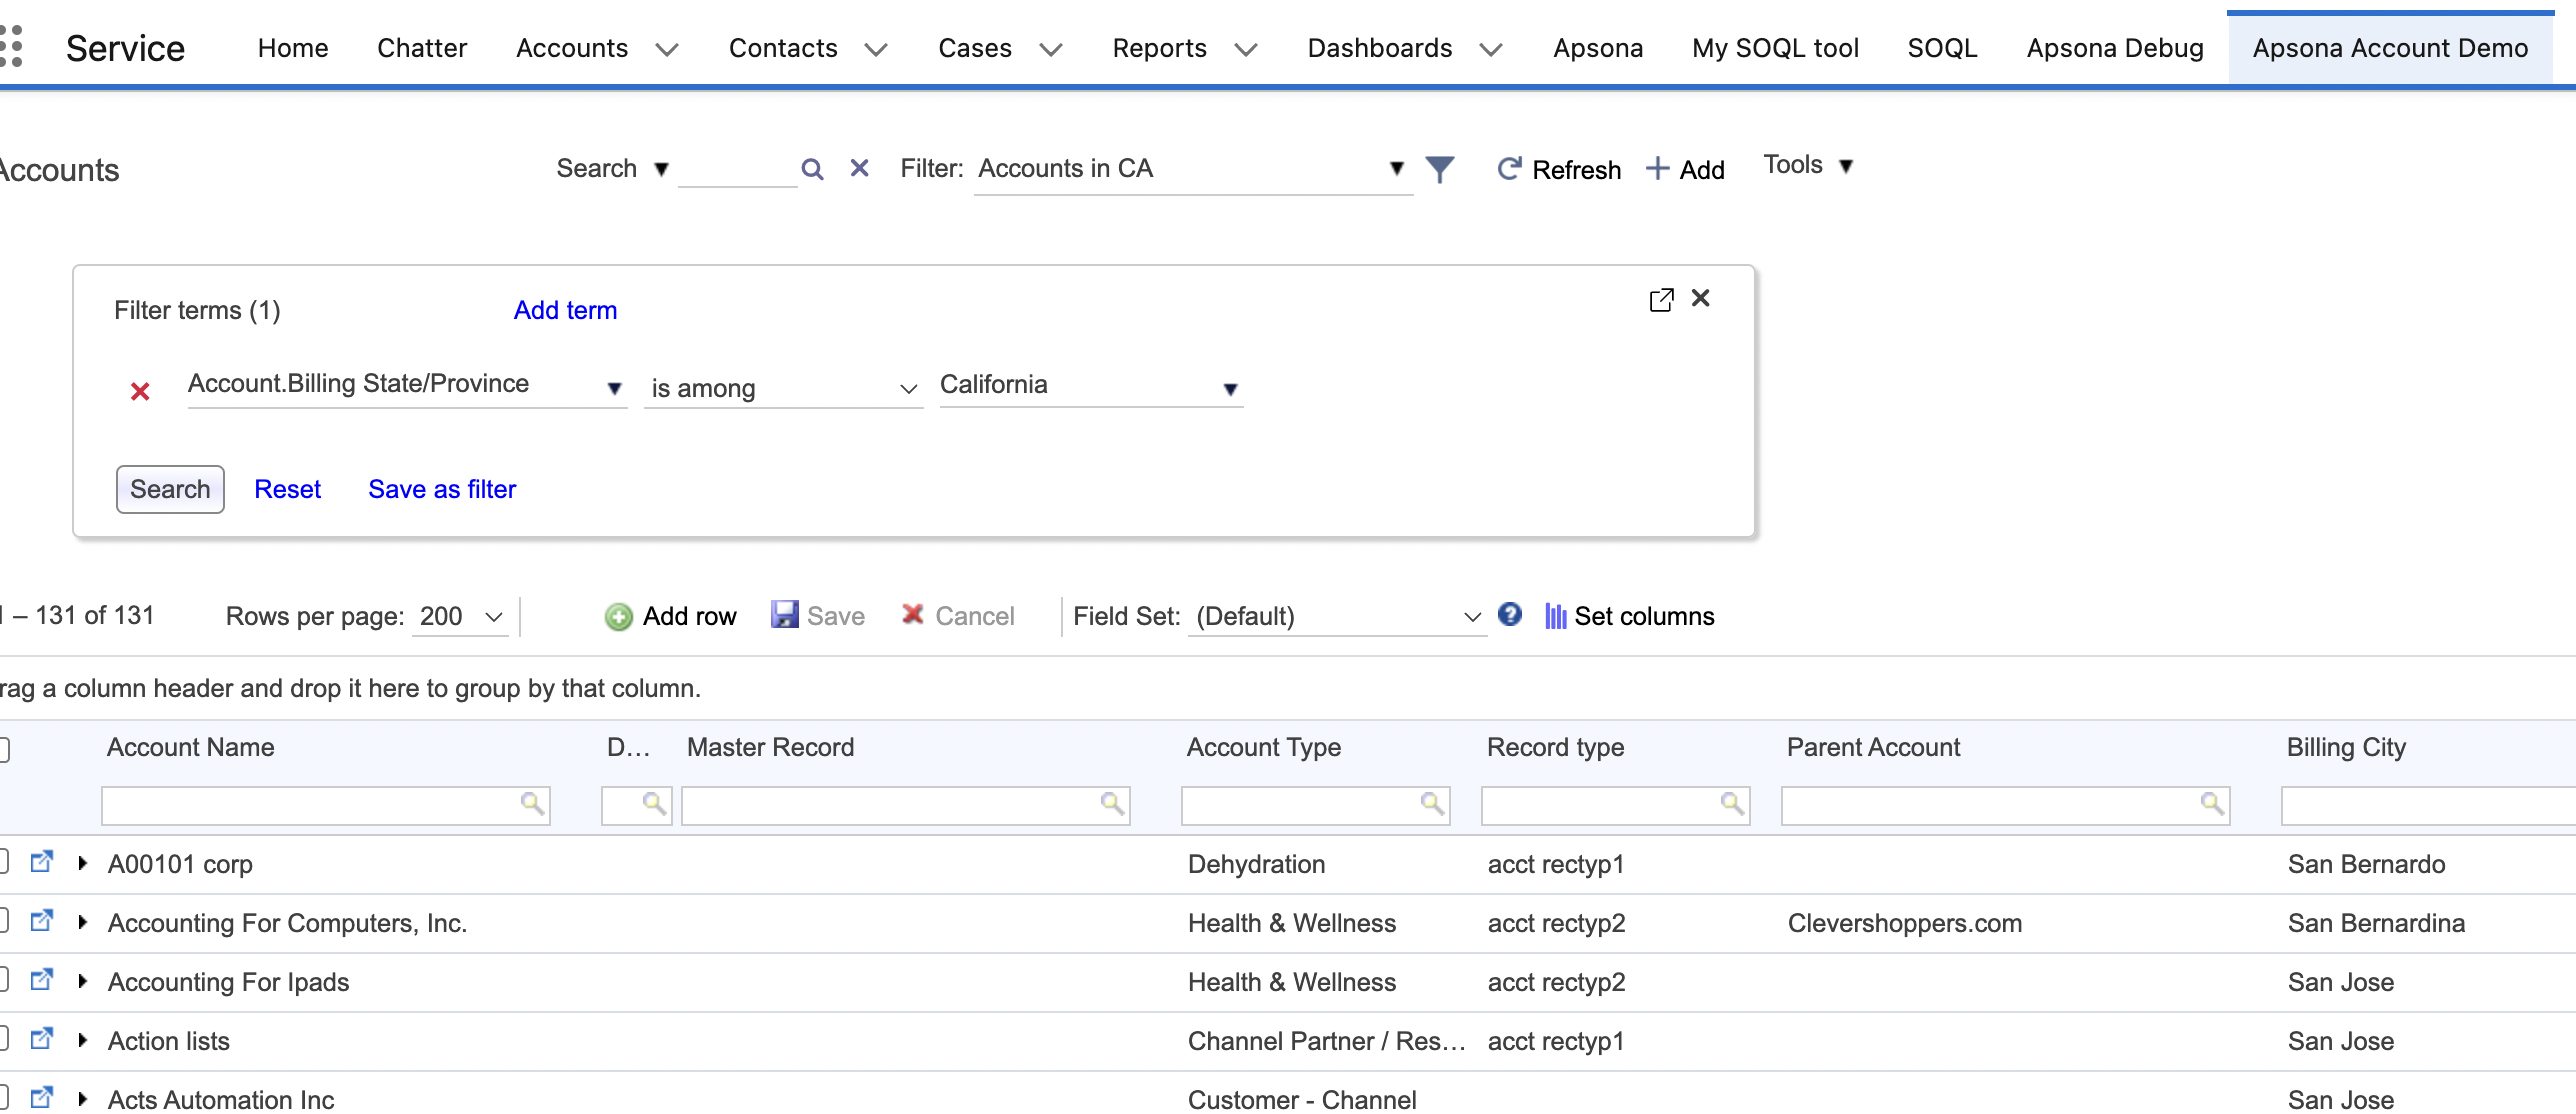
The new tab is now available as a top-level tab. You can now avail of all features and functionality available in Apsona’s tabular view in this Visualforce page.
Tabular views as related lists #
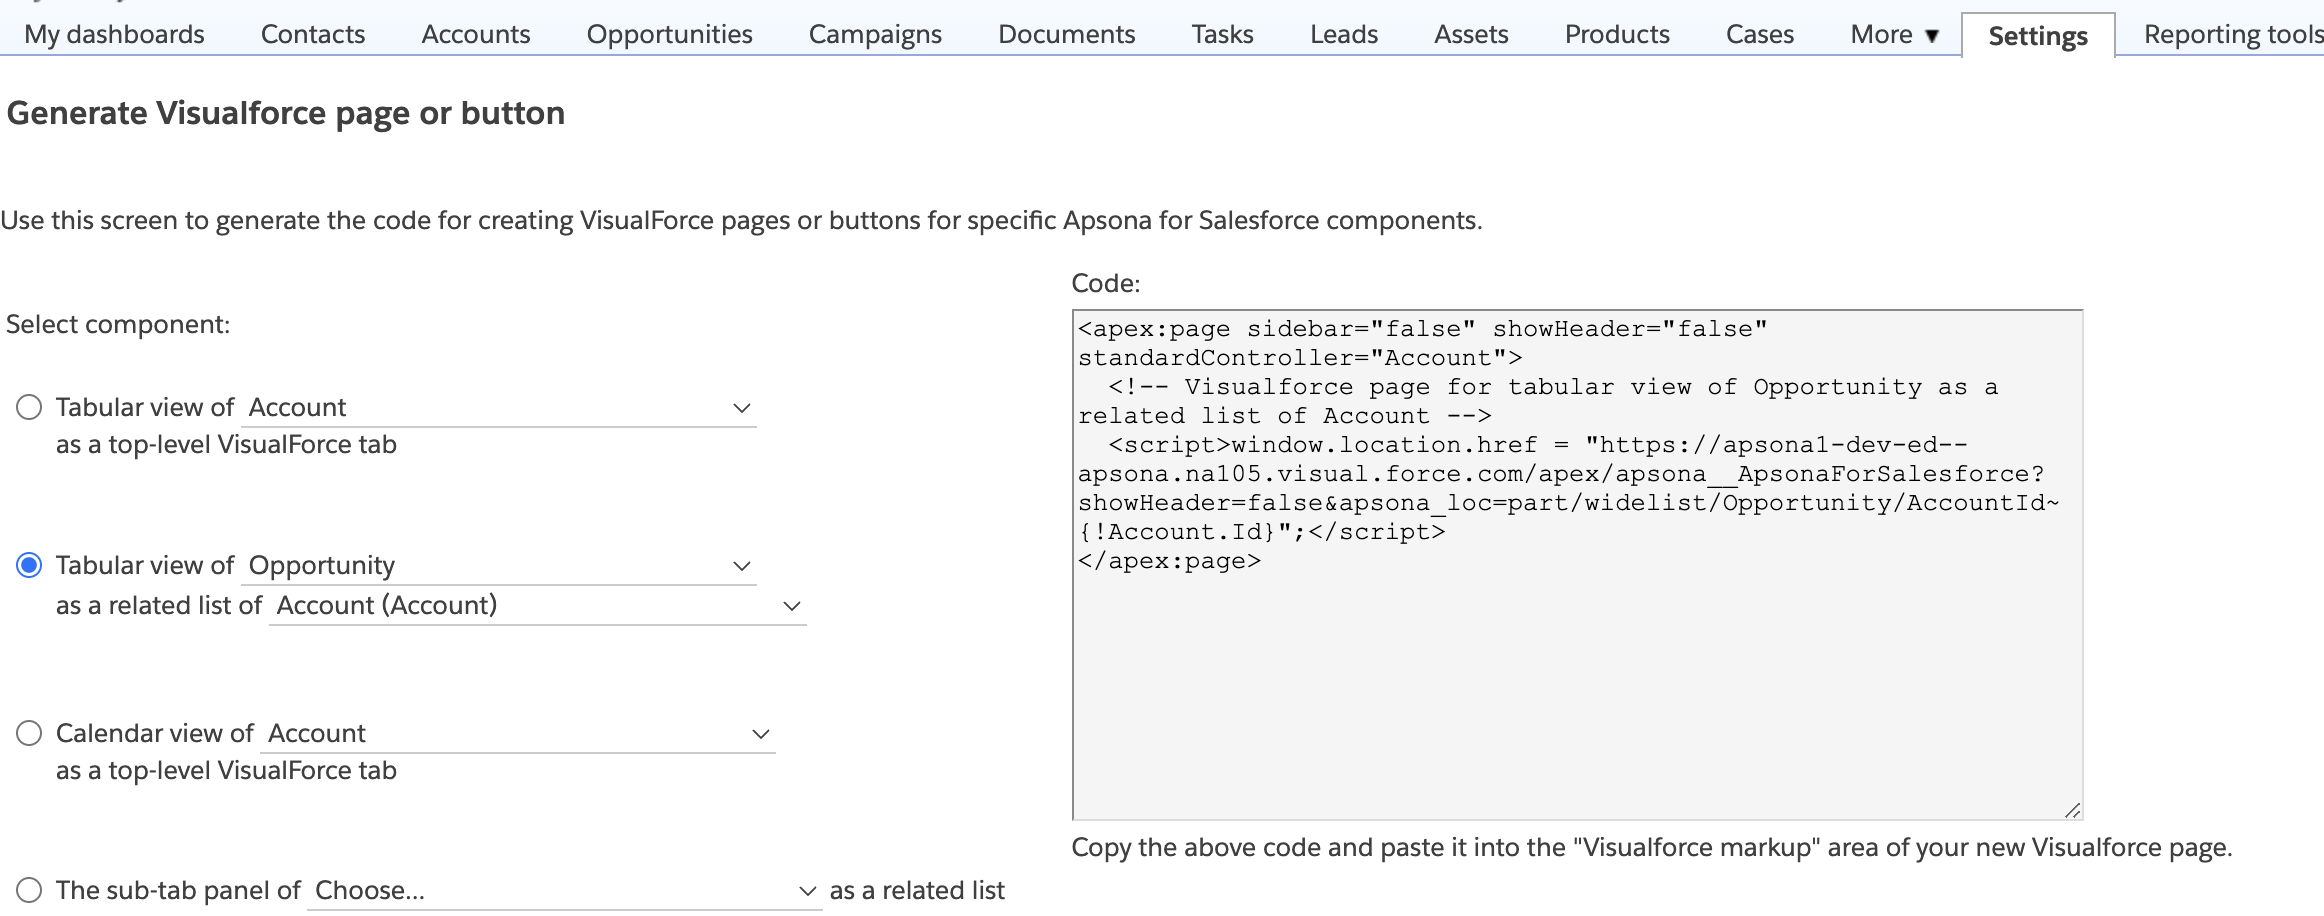
Click on the Settings tab in Apsona and select Visualforce pages. Select the object you would like to embed the tabular view from the dropdown. In the second drop down the related objects to the selected object will show up. For example if you choose Opportunity as the object to embed, the related objects that will show up are Accounts, Campaign, Price Book and User. Select the related list object and click on Generate Code.
Copy the generated code. To create a new Visualforce page In Salesforce, click Setup – Custom Code – Visualforce Pages.
Just as in the earlier example, give the new Visualforce page a Label and a Name. Add underscores between words in the Name. Paste the code generated from Apsona in the Visualforce Markup area. Check “Available for Lightning Experience…” if you would like to use this page within a Lightning page. Click Save. The new Visualforce page “Opps In Accounts” is now ready.
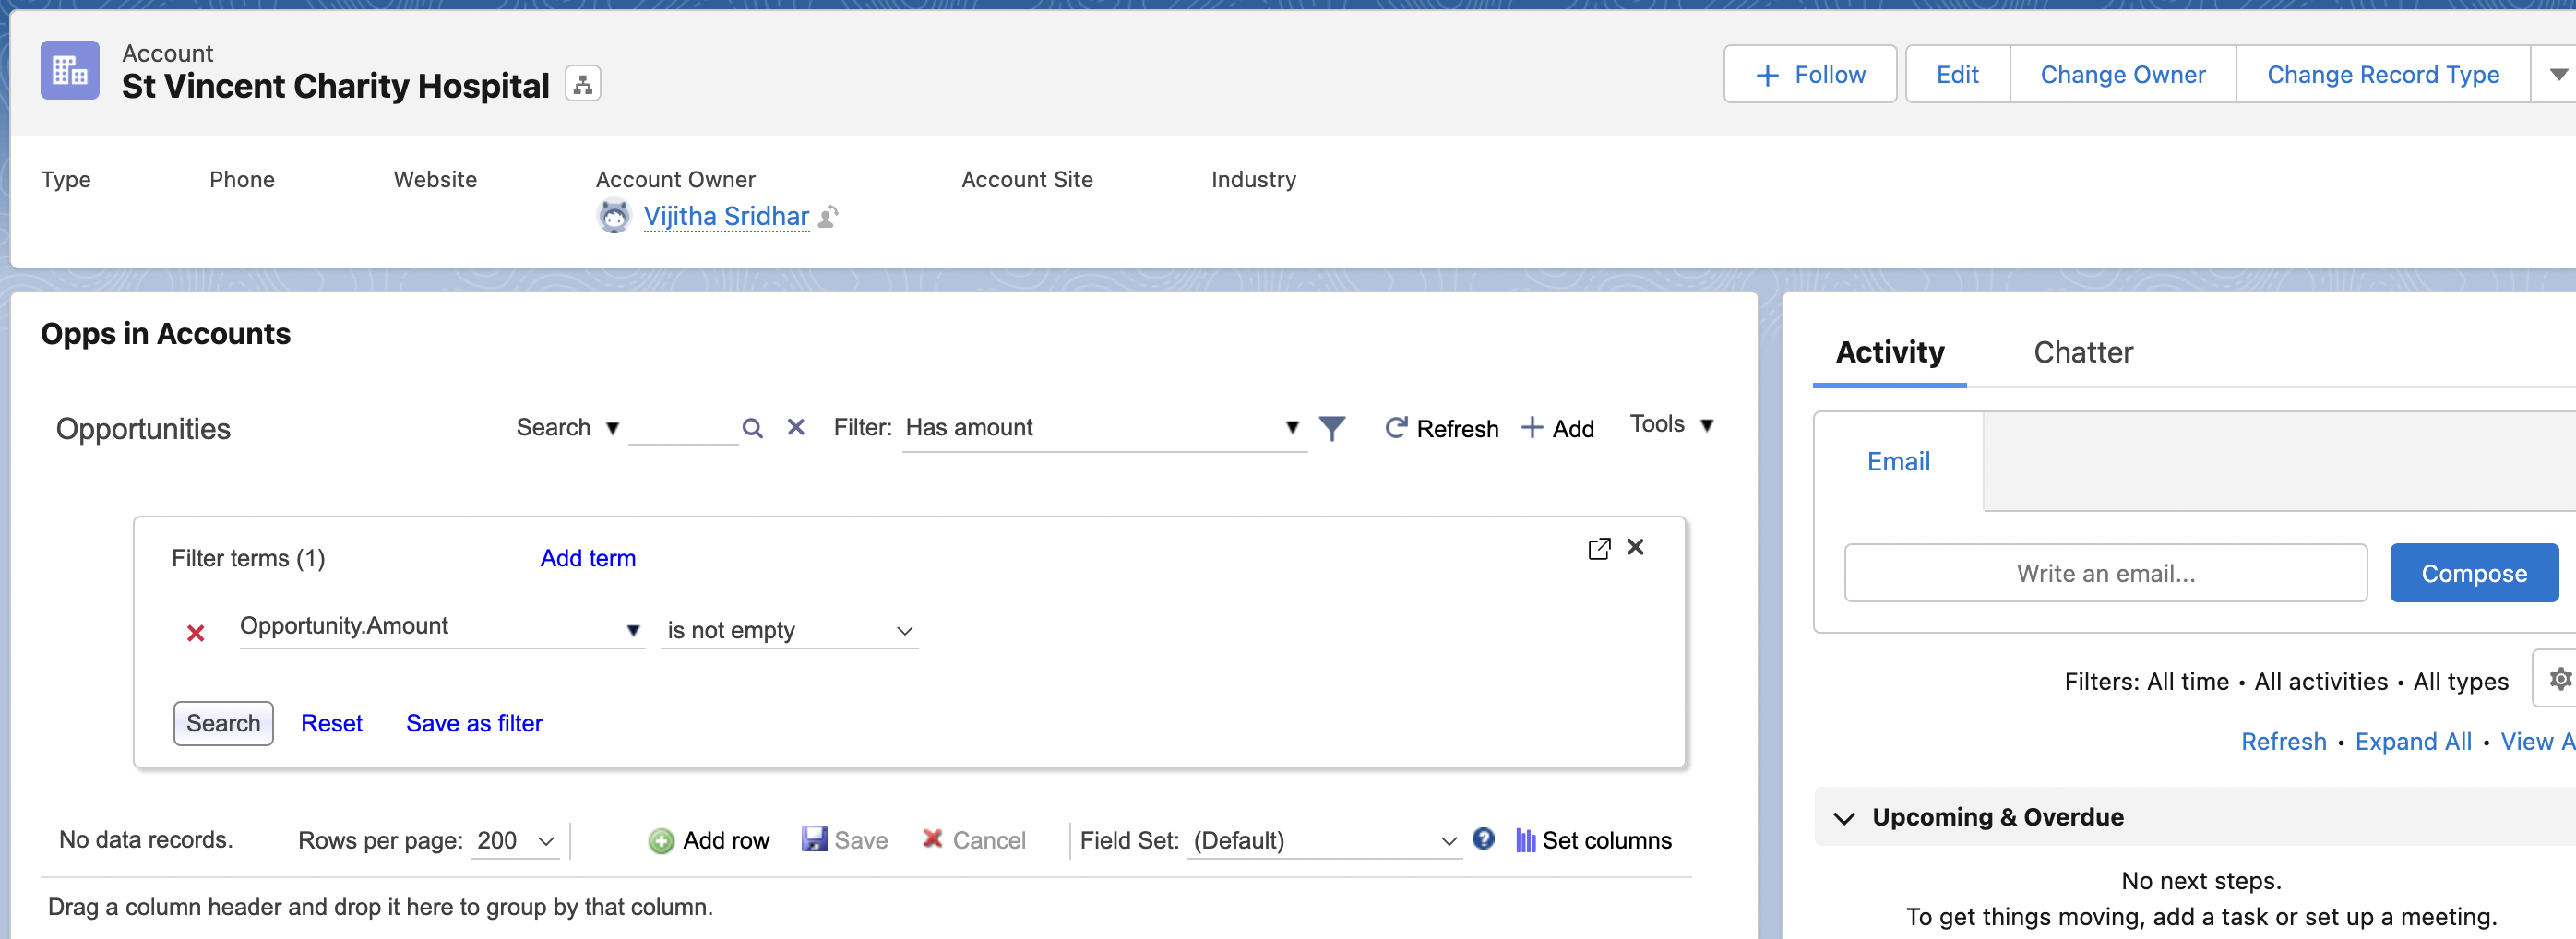
We will now embed this page in the Accounts edit page layout.
In Lightning, go to an Account detail page. Click the gear icon at the top right – Edit page. Find the Visualforce component under Components – Standard. Drag the Visualforce component to the layout. Add/edit the page properties like the page to use, and the height in pixels. Save the page layout.
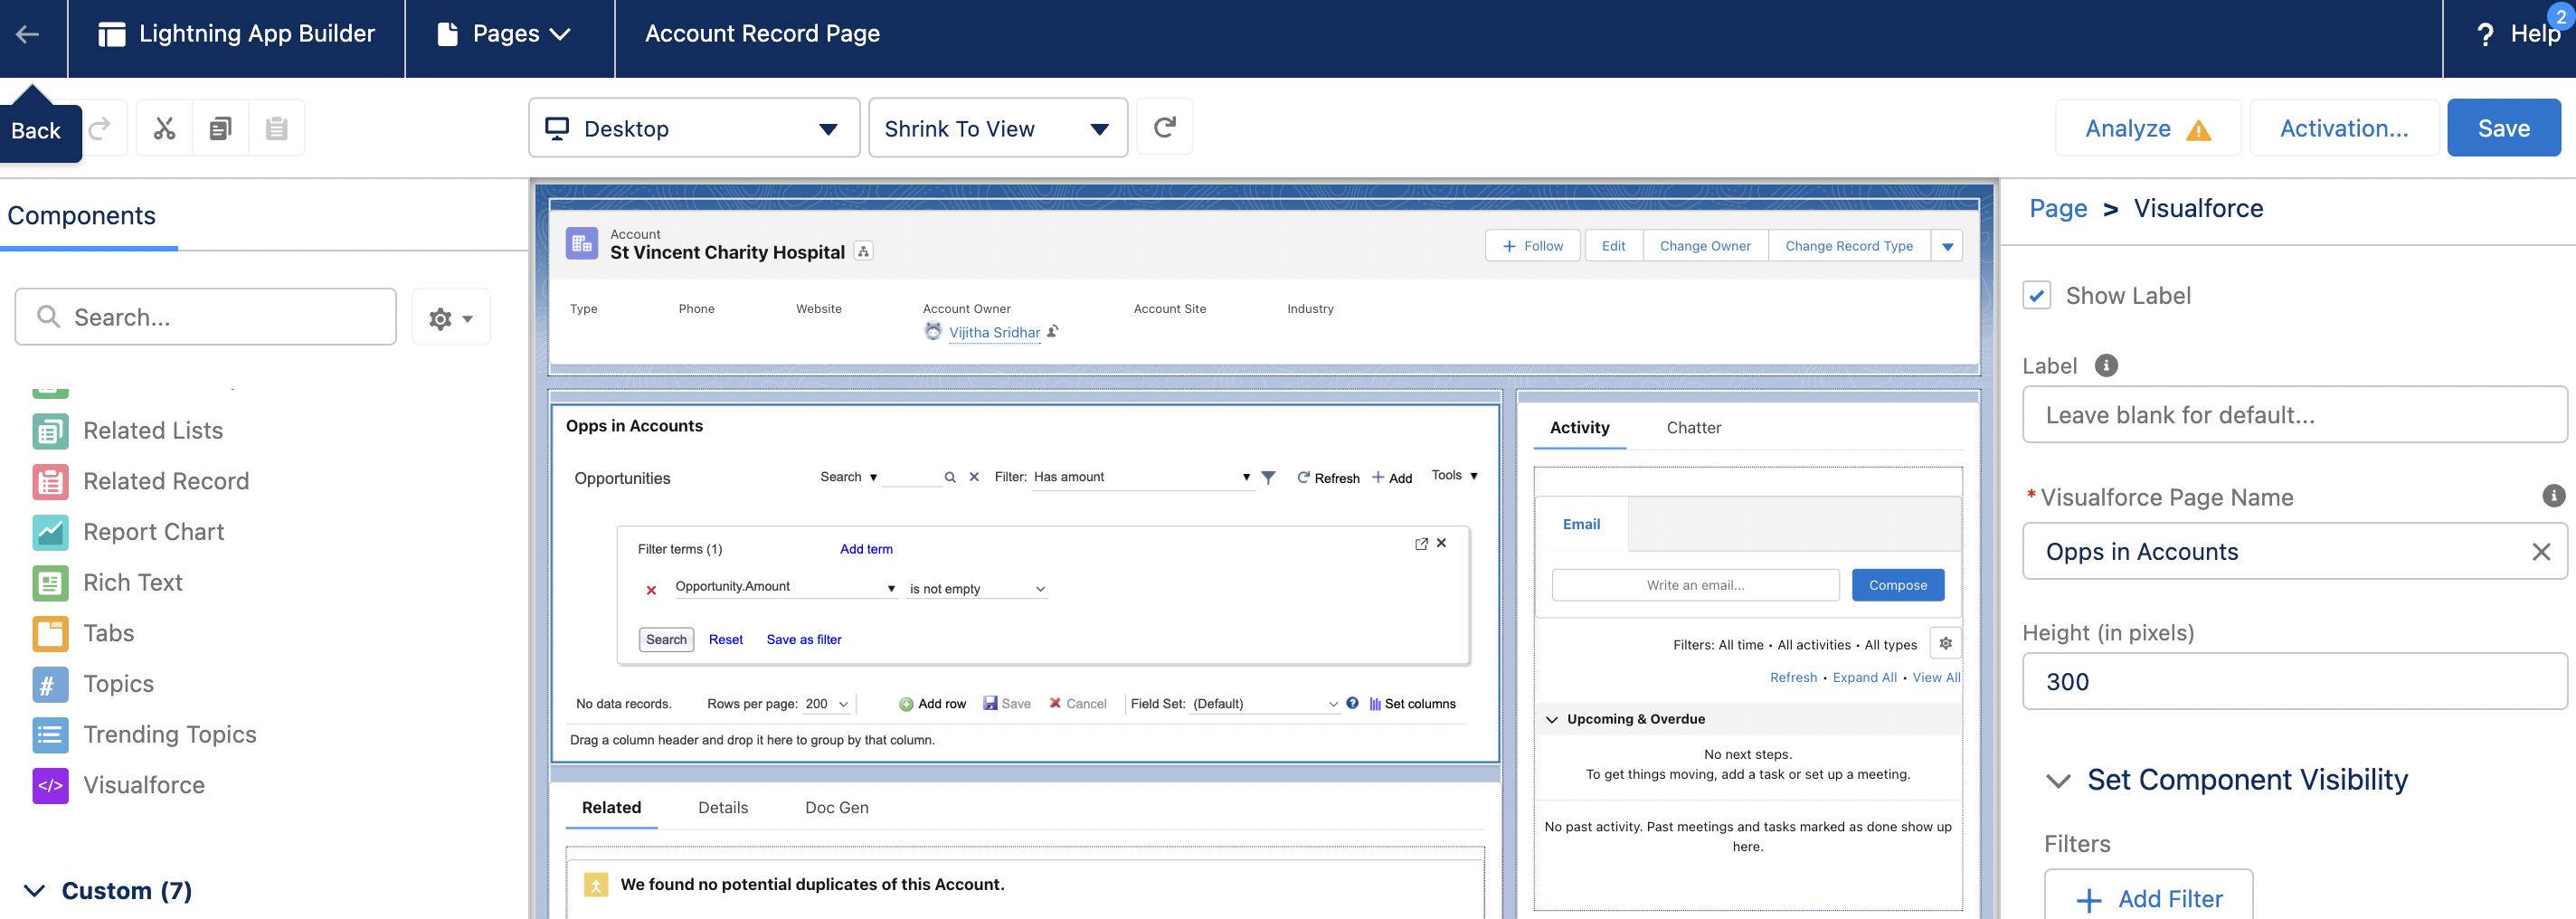
The Opportunity tabular view is now embedded in the Accounts detail page.
Apsona reports as related lists #
You can also embed an Apsona single-step or multi-step report as a related list in a Salesforce detail page. For example, if you create a Campaign Member report that lists the contacts of a particular type (e.g., high-value contacts) in a Campaign, you can embed the report in a related list of the Campaign object, so that you can see at a glance the high-value contacts who are in the specific campaign shown in the page.To create the embedding, the steps are very similar to the ones shown above for a tabular view.
- Navigate to Settings – VF pages and buttons, and select the radio button that lets you generate code for the Visualforce page for that report.
- Select the object for which you want the report to be a related list, and click “Generate code.”
- Simply copy the generated code and paste it into a new Visualforce page in Salesforce.
- Add the new Visualforce page into your detail layout for the object.