Overview #
 View Video
 Apsona’s tabular view offers a grid representation of the records of an object. This view combines the ease of editing found in a spreadsheet program, such as Excel, with the searching and data sharing features of web applications. You can use the search features to quickly find records from your Salesforce database, use the in-place editing to update your data with a few clicks, and the updates are immediately available in Salesforce. With the tabular view (as with other Apsona views), there is no annoying page refresh, so you do not lose context when you are editing data. Nor do you need to navigate from a list to a detail view to an edit page and back again just to edit a few data records.
You can also embed tabular views in Visualforce pages, so you can create a free-standing Visualforce tab containing just a tabular view of one specific object. Such pages are commonly used in customer and partner portals. And you can create a tabular view as a related list in a Salesforce detail page. For example, you can embed a tabular view of Opportunity records as a related list of the Account object.
Here are a few common use cases for the tabular view.
- Find a list of records that all need some form of updating, and edit each record in place. For example, you might want to use the Opportunity tabular view to find all Opportunities with activities last week, and update their statuses or expected values by simple in-place editing.
- Perform a mass update of one or more fields of a filtered list of records. For example, when a salesperson leaves your company, you might want to transfer the ownership of all her records to another salesperson, and perhaps update the commission rate field as well.
- Mass-delete a filtered set of records, e.g., to undo the effect of an incorrect data import.
- Identify a list of Contacts or Leads based on multiple filtering criteria, and add them all to a new Campaign. In this case, all of the records across all pages are added to the campaign, no matter how many. This makes it a matter of just a few clicks to add large numbers of Contacts or Leads to a Campaign.
The tabular view sports several useful functions.
Column selection #
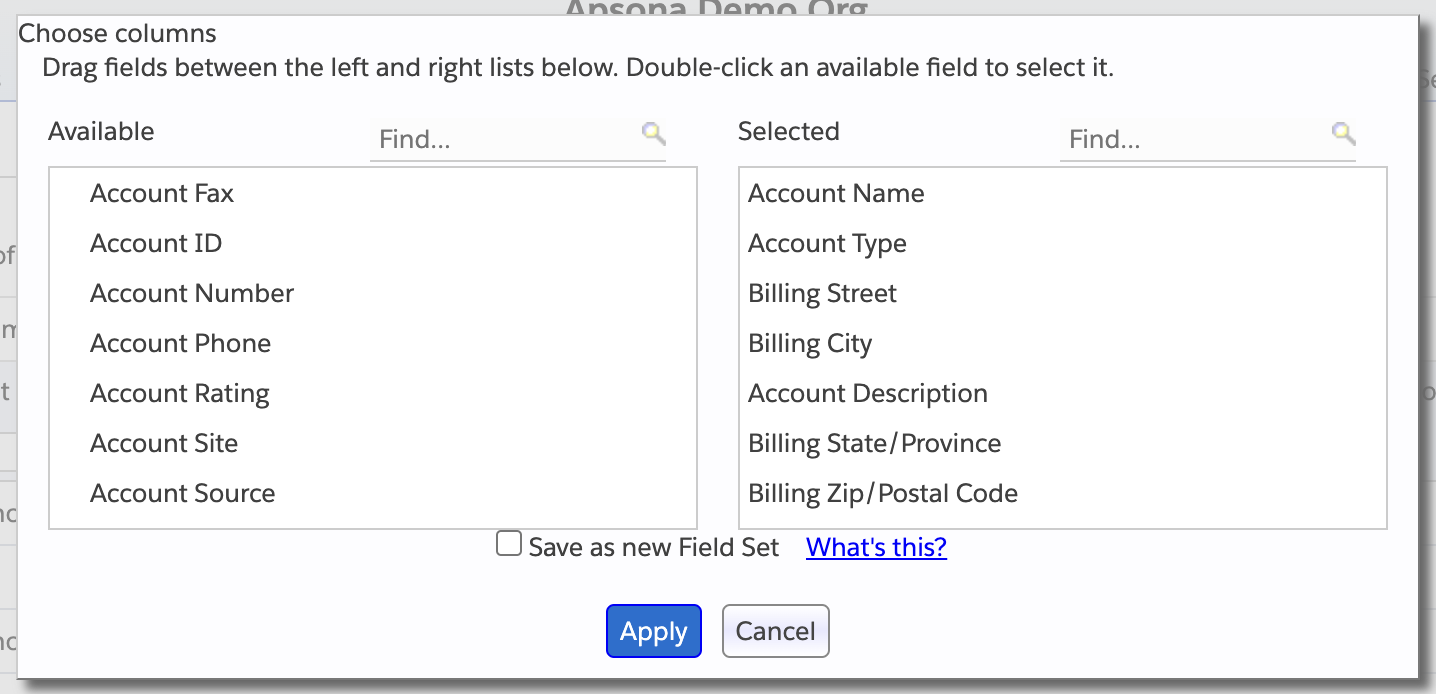
When you click the “Set columns” button, a popup window appears, enabling you to select the fields you want shown in the grid. You can select any field of the current object or any field from an object to which there is a lookup from the current object. For example, in the Opportunity tabular view, you can select Opportunity fields, Account fields or Campaign fields. You can also re-order the selected fields to fit the ordering that is most natural for your work. Apsona remembers the fields you have selected as well as their ordering, so that the next time you log and access that same tabular view, you will see the columns in the order you have chosen.Also see the section on field set management below.
Column resizing #
The width of each column in the grid can be adjusting by clicking and dragging the “grip” icon that appears at the right of the column header. So you can use wider columns for larger data fields, and narrow columns for fields such as numbers or date values. As with fields and ordering, Apsona remembers the column with settings and renders them at the same width when you log in next.
Column reordering #

You can reorder the columns in a tabular view by simply dragging the column header and dropping it into the position where you want it. Apsona remembers the ordering of the column headers in conjunction with the field set, and renders the columns in the same order when you log in next.
Groups and subgroups #
You can render your tabular view records in groups, based on selected columns, simply by dragging the grouping columns into the grouping bar at the top of the grid. Click the image at left to watch a short animation showing how you can group a list of Opportunity records, first by Stage and then by Campaign. The record groups can be opened and closed via the toggles at the left side of the record. If your columns include currency fields, Apsona automatically displays subtotals at the first-level grouping. The animation at left shows subtotals at the Stage level, since that is the first grouping level. To remove a grouping, simply click the ‘x’ inside the grouping indicator in the grouping bar.
Searching and filtering #
Apsona includes a powerful set of features for searching within each object as well as across objects. Search criteria can be saved as named “filters” which can then be reused.
Sorting #
The records in the grid can be sorted on any of the columns in the grid (except, of course, those that Salesforce does not support, e.g., long text fields or multi-select picklist fields). To sort on a column, simply click the column header once. This will sort the records into ascending order on that column. If you click the column header again, the records are sorted in descending order on that column.
Pagination #
The grid presents data records one pageful at a time, and includes a paging ribbon to navigate between pages. The number of records in a page is determined by a selector at the top of the grid.
In-place editing #
To edit any of the cells, simply click the cell, and an editor of the appropriate type appears. For example, if you select a picklist field, a dropdown is shown containing the valid values for that picklist; if you select a date field, a date selector appears. If you select a lookup field, an auto-completer appears into which you can type a few characters of the name of the looked-up record, and Apsona will retrieve a list of matching candidate names from among which to choose one. Apsona automatically chooses the correct type of editor suited for the field, so that editing errors are minimzed.
Adding records in-place #
You can also add a new record with just the fields in the tabular view, by clicking the “Add row” button at the top. After clicking the button, type the data into the editors which appear, and click the Save button. Note, though, that to use this feature, your tabular view’s columns must include all of the required fields of the object (e.g., when adding a Contact, the Last Name field is required).
Sub-tabs #
Alongside each row in the tabular view is shown a little arrow which, when clicked, shows a panel containing child tabs. Each child tab displays records from a related object, either parent or child. The fields in the child tab are also editable in-line, as usual. This panel contains the same tabs, in the same order, as the child tabs shown in the console view. To edit the layout of these tabs, switch to the console view (i.e., the “All records”) menu, then click Tools – Edit layout – Child tabs.
Mass update and mass delete #
These features are available in the Tools menu, as documented elsewhere.
Field set management #
It is often convenient to create multiple sets of fields corresponding to different perspectives on your data. For example, suppose your organization maintains two different kinds of Opportunity records, say generic opportunities and key opportunities. When viewing the key opportunity records, you would want to see the specific fields for the key opportunities, and these fields might not be relevant for the generic opportunities. You can achieve this variation via field sets. A field set is simply a named list of fields.
Selecting a field set #
The tabular view includes a field set selector via which you can change the field set to show. When you change the field set selection, the tabular view is redisplayed with the fields from the newly-chosen field set. Note that any filtering that you have applied remains unchanged. Also, if you resize the columns of the table, the column sizes are saved with the currently-selected field set. Thus each field set remembers a list of displayed fields along with their column widths.

Creating and modifying a field set #
When you click the “Set Columns” button, the displayed popup window lets you select the fields you wish to show in the view. The popup also includes a checkbox to save the seleted list as a new field set.
- If you do not check this box, the fields you select will be associated with the field set that is currently shown in the tabular view. So when you click the “Save” button in the popup, the currently-shown field set will be modified to reflect the columns currently selected.
- If you do check the box, you can provide a name for a new field set, and the selected columns will be associated with the newly-created field set.
Managing saved field sets #
Field sets are stored in the Apsona Items object, which is available to administrators via the Settings menu. So if you are an administrator, you can access the Apsona Items object and filter it to find the records whose item type is Tabular View Field Set.
Sharing field sets #
Normally, field sets are shared between users with the same profile. More precisely, if you create a field set, and your profile has the “View Setup and Configuration” permission set, your field set will be available to you as well as to other users with your profile. But if you do not have that permission set in your profile, then you will be able to see only your own field sets, not anyone else’s.
It is, however, possible to set up fine-grain control over field-set sharing via Apex sharing of Apsona items.
Lightning Component #
You can embed an Apsona Grid as a component in the Lightning Experience, in any page where a custom component can be included. To do this, follow these steps:
- If you have not already done so, install our Lightning Component Pack from the AppExchange, via the following installation URL:for production and developer orgs
for sandbox orgsThis will make available a Lightning Component named ApsonaGrid in your Lightning Page Builder UI.
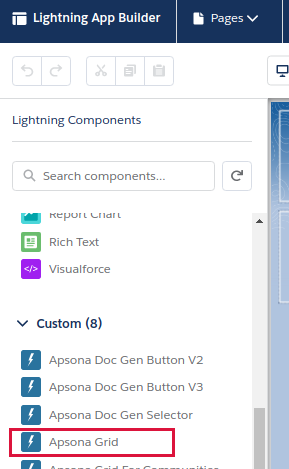
- Add this component to your page. When you click on the component within the page builder, the properties of the component will appear as in the screen shot below.
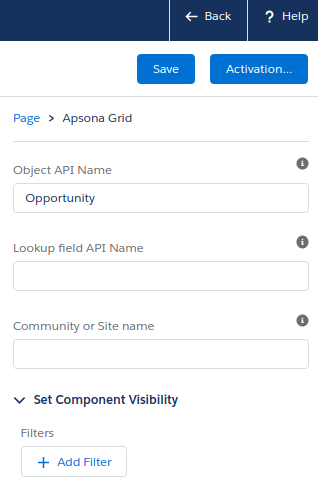
- Set the “Object API Name” field to the API name of the object for which you want the Grid.
- For related lists:
- If you are using the grid as a related list in a detail page, set the “Lookup field API Name” field to the API name of the lookup field to use. For example, if the grid is on an Account page and needs to show Opportunities related to the Account, you might use the AccountId field of the Opportunity, since that field relates Opportunities to Accounts.
- If you are not using the grid as a related list, leave this field blank.
- If you are using the grid in a Communities page, set the “Community or Site Name” field to the name of the Community. If the page is not a Communities page, leave this field blank.
- Save the page and deploy it.
Administration features #
If you are an administrator, you can set up several aspects of tabular views for your users:
- You can determine the objects and fields accessible to a user. You can also determine whether the users of a particular profile are allowed to edit, import or delete data. These are described in the customization document.
- You can set up a default set of columns that will appear the first time a user logs in. This can be done via the Settings – Tabular View Layouts menu item.